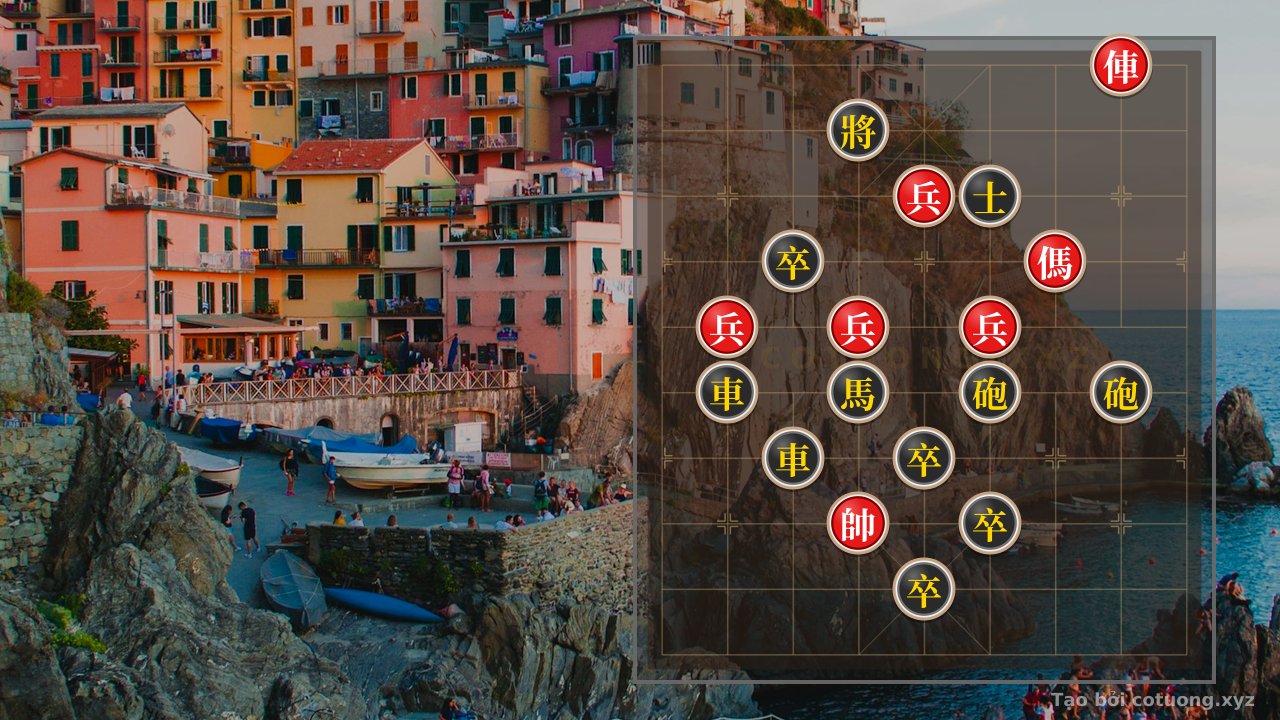
Challenge: The 2 Rook vs Black Cannon: A Calculated Trap and Subtle Counterattack - Can you solve it?
The Rook formation faces the concentrated firepower of the Black Cannon along with the aggressive pair of Horses. Can the Red General withstand this deadly strategy? Discover the secrets behind this seemingly simple but treacherous position, where every move is a test of life and death. We analyze from the perspective of the lone Rook, the key piece of its side, to uncover the survival tactics in this decisive battle.